
Oh yeah here's the Bret cookies:

For the Sugar Cookie Dough (A slightly revised version of Alton Brown's Sugar Cookie recipe)
3 cups all-purpose flour
3/4 teaspoon baking powder
1/4 teaspoon salt
1 cup unsalted butter, softened
1 cup sugar
1 egg, beaten
1 tablespoon milk
2 1/2 teaspoons raspberry jam
Heart shaped cookie cutter (I used a knife but a cookie cutter will make this A LOT easier)
[This dough makes about 24 cookies. I only used half of the dough and reserved the other for some future baking venture. You could just cut the recipe in half, or make the entire2 dozen.]
For the royal icing:
3 ounces of egg whites
3 teaspoons of cream of tartar
1 teaspoon of vanilla extract
About 3 1/2 cups Powdered sugar, but have more just in case.
Pink food coloring.
Black food coloring.
Three ziplock bags.
Parchment paper
A printed copy of the Bret Hart logo, making sure the heart is about the size of your cookie cutter heart.
[This recipe makes enough icing for about 15 cookie decorations. Recipe can be doubled.]
---Sift together all the dry stuff.
---Beat the butter and sugar in the bowl of an electric mixer until it's all nice and fluffy. Add the egg milk and jam and beat until combined.
---With the mixer on low, slowly add the dry stuff, scraping every once in a while, until combined.
---Divide the dough in two, wrap in the item of your choice (I used plastic wrap, Alton suggested wax paper) and refrigerate for at least 2 hours.
---After two hours, preheat the oven to 375 degrees.
---Roll out half of the dough, leaving the other half in the fridge so it stays cool. Use some powdered sugar so the dough doesn't stick too much.
---Using the cookie cutter, cut out your cookies and place them on a parchment paper lined baking sheet.
---Bake for 9 minutes, or until brown at the edges, turning the sheet halfway through the cooking time.
---While the cookies cool, make the royal icing.
---Beat the egg whites, cream of tartar, and vanilla until frothy.
---Slowly add the powdered sugar.
---Add sugar until it's the consistency of condensed milk, or that Borax and water stuff you made in elementary school.
---Divide the icing in half. Dye one half pink. Cover this half and refrigerate.
---Pour 3/4 of the remaining white icing into one of the ziplock bags. Cover and refrigerate the 1/4 still in the bowl.
---Place the printed logo under a large sheet of parchment paper.
---Cut the corner of the ziplock bag to make a small opening.
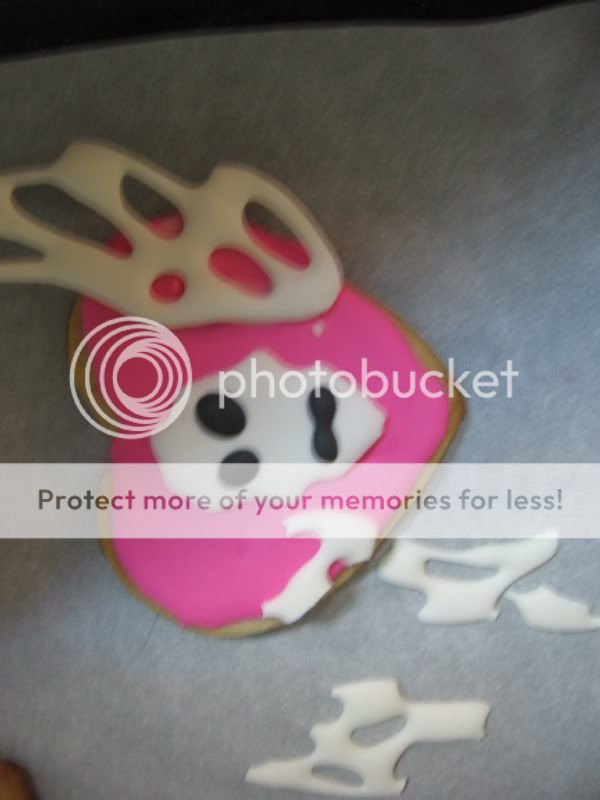
---Pipe the icing on the parchment in the shape of the wings and skull. [The icing should be thick enough to keep its shape. If it's not, add some more powdered sugar.]
--- Move the printed logo to a clear area of the parchment and repeat. Make more skulls and wings than you think you'll need because a few are sure to break.
--- Leave the decorations to dry over night.
---Once the cookies are cool, pour the pink icing into another ziplock bag, cutting the corner as before. I recommend stirring the icing a bit before doing so.
---Outline the cookie's shape, then fill in the heart. Repeat for all the cookies you've made.
---Allow to dry over night.
---Once all the decorations are dry, you can attach them to the cookie.
---Carefully detach each wing and skull as you go along.
---Using the remaining icing as glue, place a skull in the middle and a wing on each side of the skull, using the printed logo as a reference.
[If the wings tend to fall backwards, roll up some aluminum foil and place under the wing in order to keep it up until the 'glue' is dry enough to hold it.]
---Repeat until all your cookies are done. Let dry for at least 4 hours.
---Dye any remaining white icing black, and using the same ziplock method, pipe on the skulls eyes/mouth. Once again, let it dry for at least a few hours.
The drying time and piping make it at least a two day project, but they're quite delicious. Enjoy!
Here are a few of the cookies that didn't quite make it:
 Poor guys didn't know what was coming. I assure you these injured cookies were given the proper treatment.

No comments:
Post a Comment